

In this article, we’ll show you how to verify your Skrill account, step by step.
Account verification is mandatory if you want to use Skrill in full-feature mode. If you prefer not to verify your account, you can still make transactions, but the amounts are limited.
The verification process is split into two:
I. Completing the registration;
II. Making the first deposit in order to verify your identity;
These can’t go one without the other. Verifying your identity is not available until you make your first transaction.
You can check Chipy’s step by step video tutorial below, or continue reading the text transcript of it by
scrolling further.
I. Complete the Registration
1. Go to Skrill.com
Enter the web address for Skrill in order to get to the official Skrill website.
2. Login to Skrill
Login to your Skrill account. If you don’t have one, make sure you read our dedicated guide on how to create a Skrill account easy and free!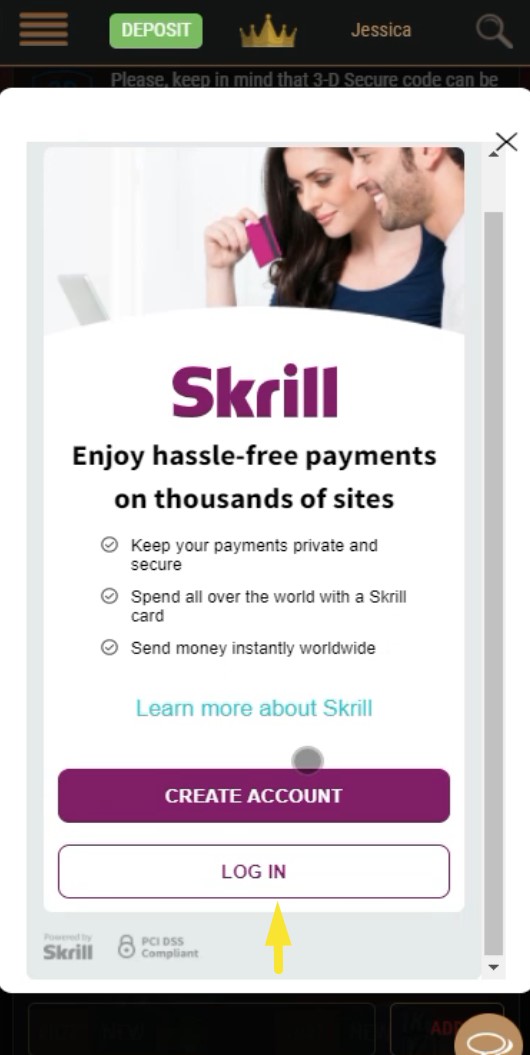
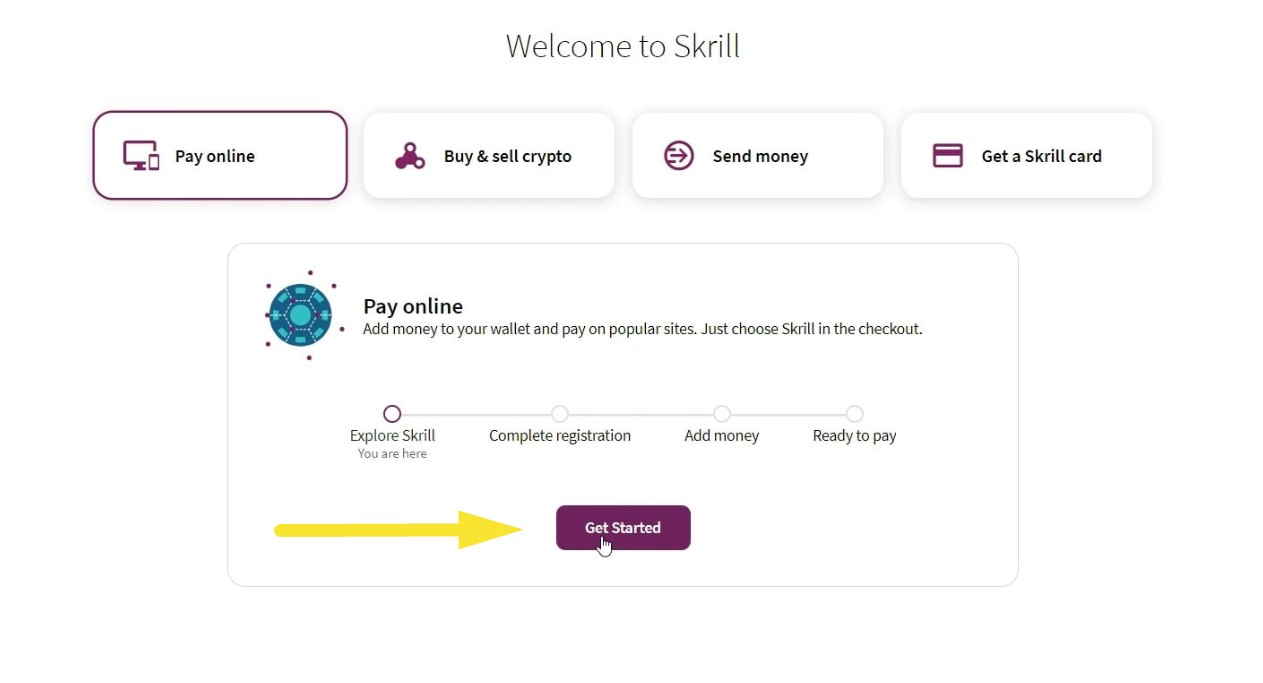
3. Choose the “Pay Online” option
Once on your dashboard, go to the “Pay Online” section and choose the “Get Started” option.
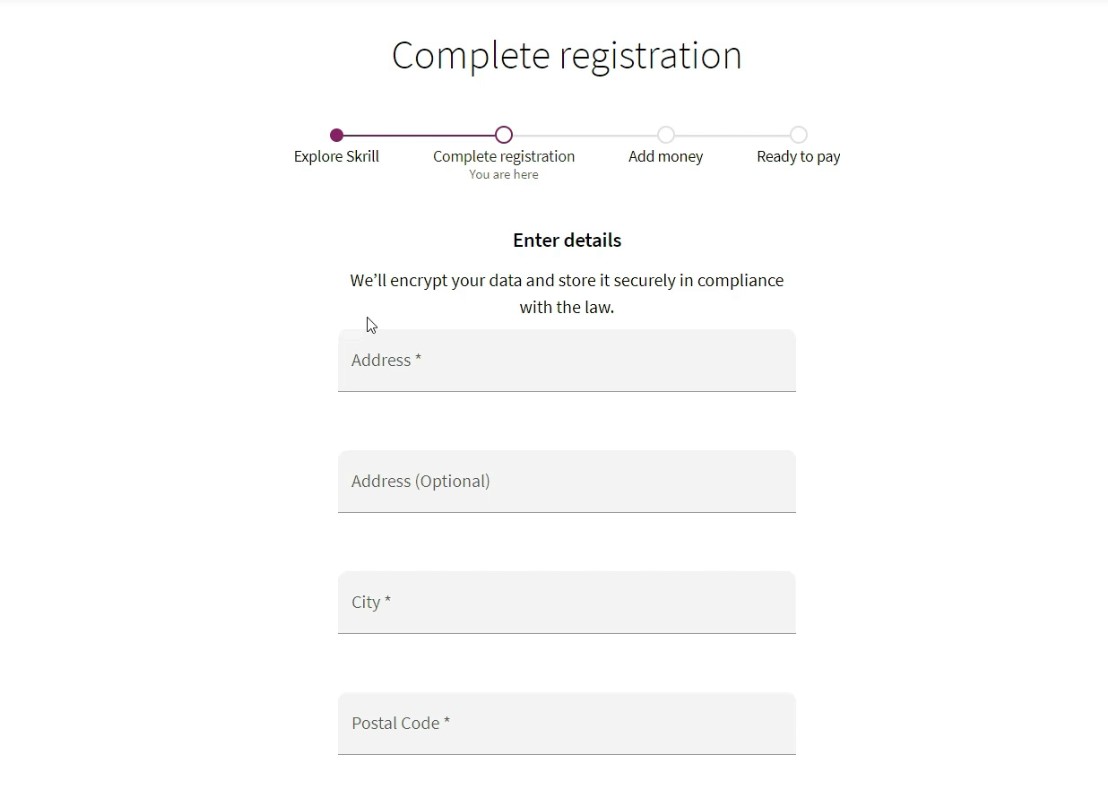
4. Complete Registration
Enter your personal information such as address, postal code, and phone number.
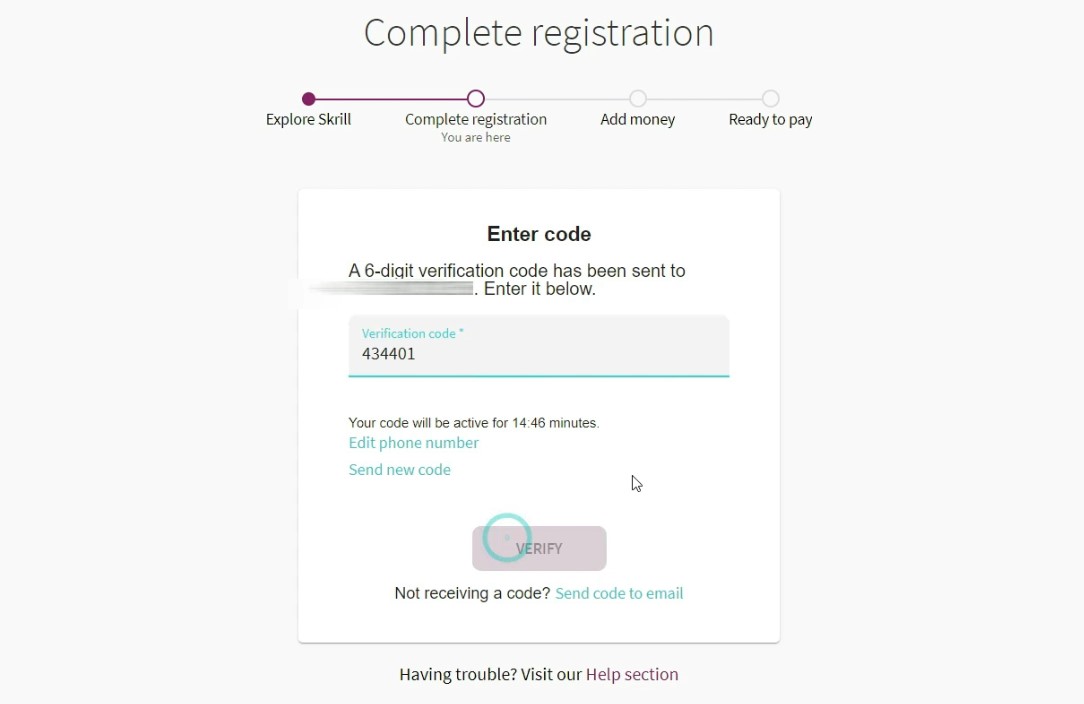
5. Verify Phone Number
Enter the SMS code you have received on your phone.
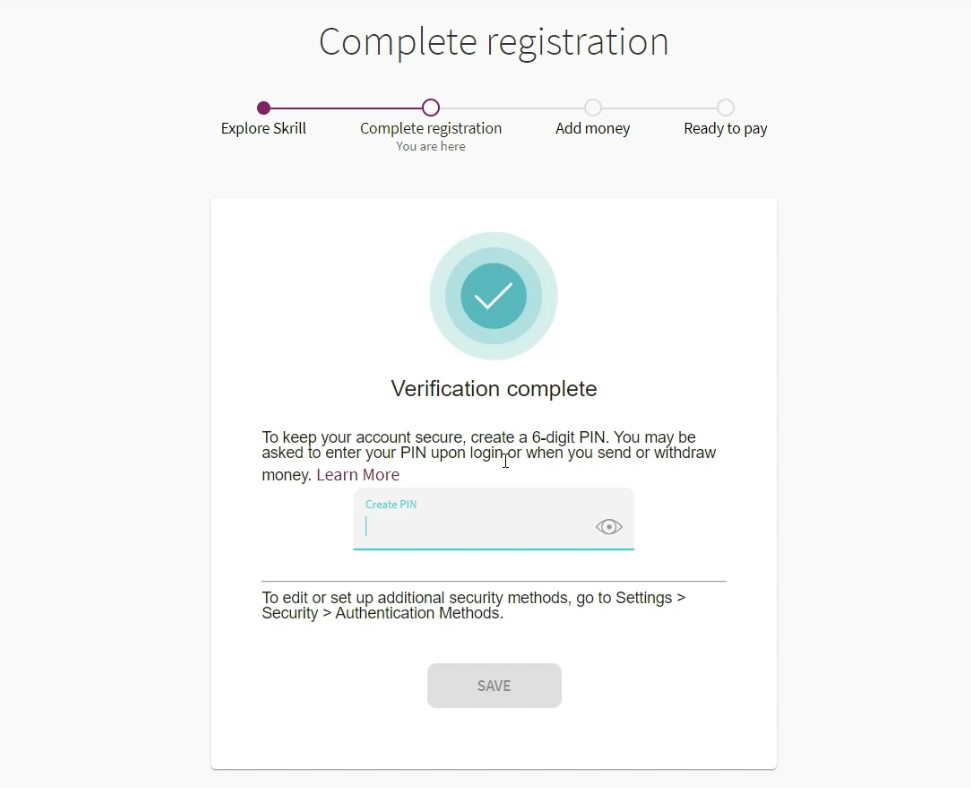
6. Create a Security Code
Create a strong unique security code and make sure you remember it!
II. Account Verification
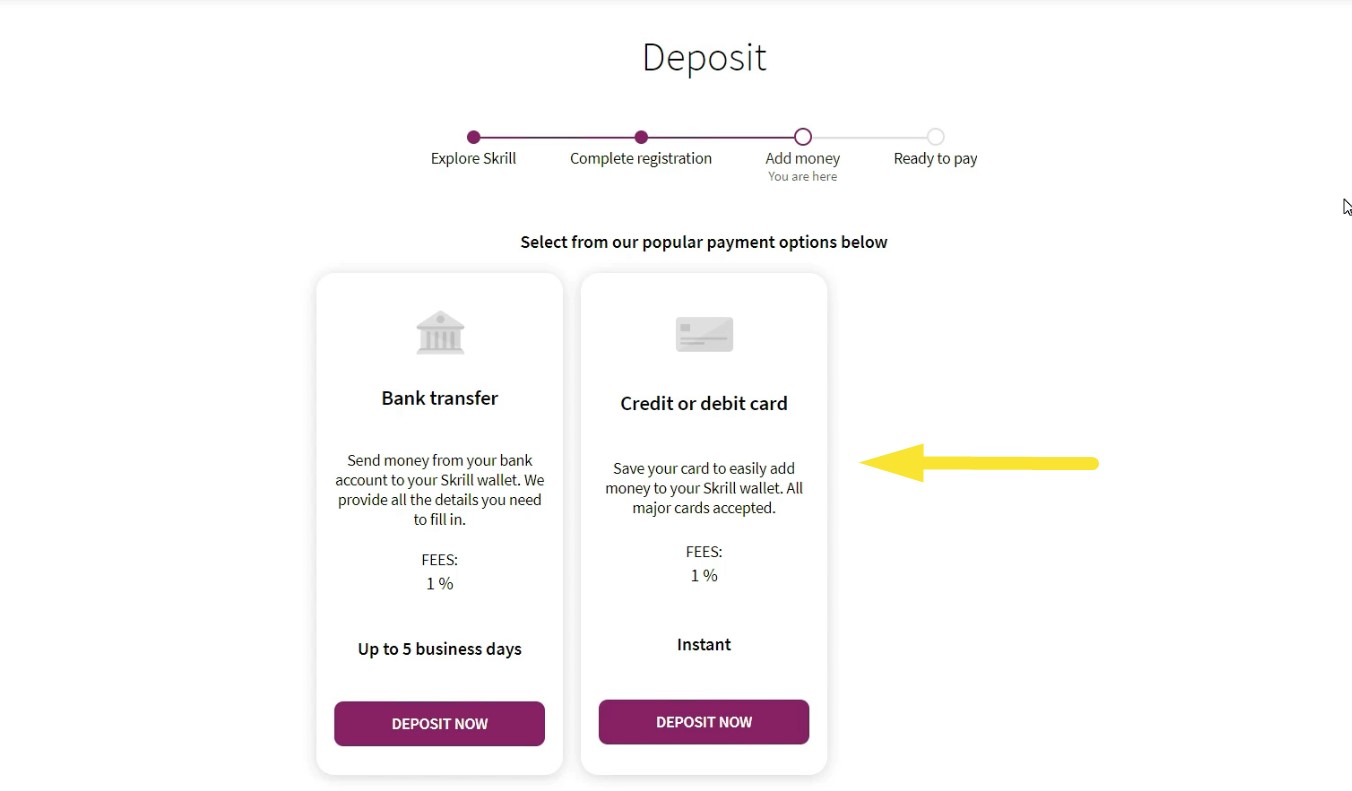
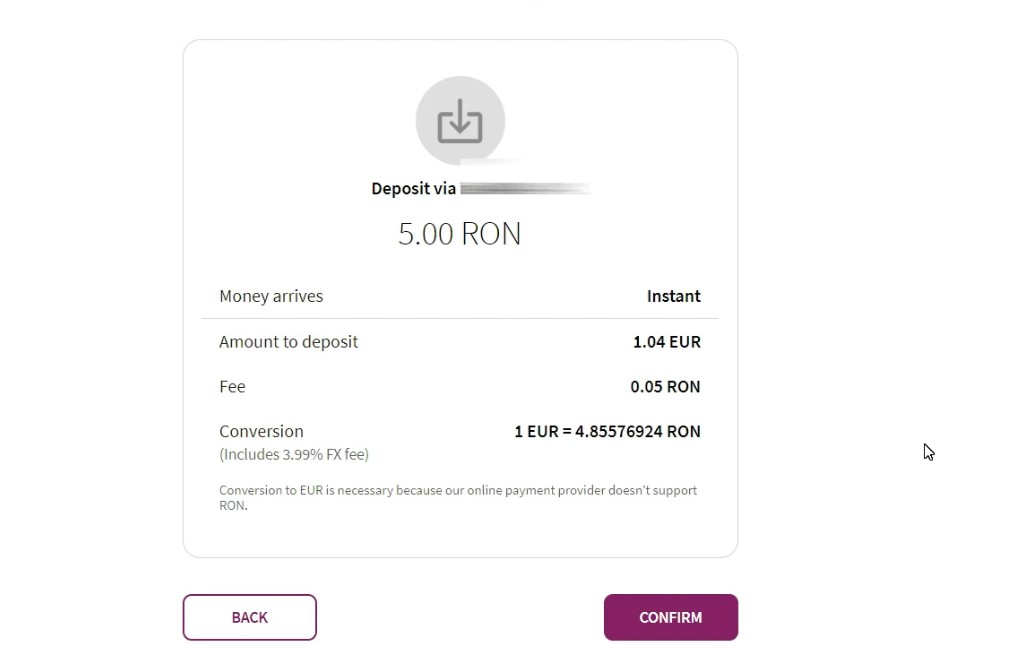
1. Make Your First Deposit
Choose a payment method. We opted for credit card.
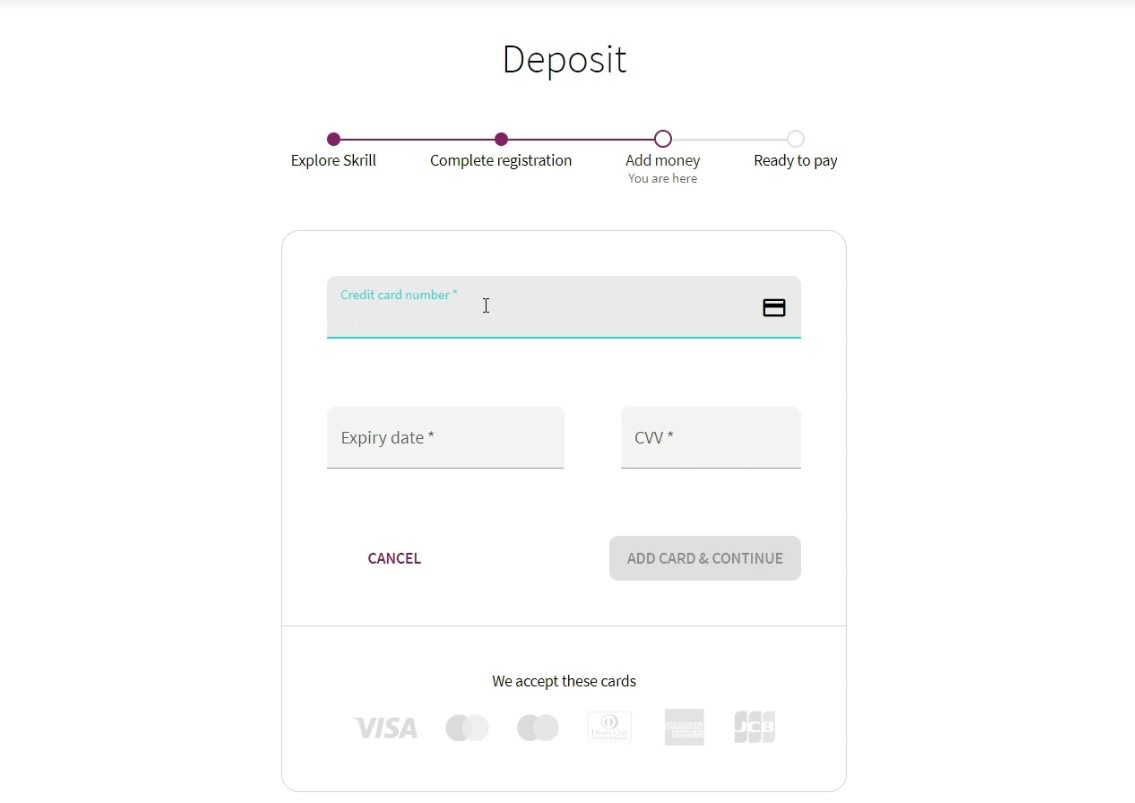
2. Enter Your Credit Card Info
Don’t be scared! Skrill’s connection is secure and the data you enter is encrypted.
3. Choose the Deposit Amount
Enter the amount that you wish to deposit.
4. Verify Your Identity
This section implies going to your account settings, in order to be able to choose the “Verification” option once you have made your first deposit at Skrill.
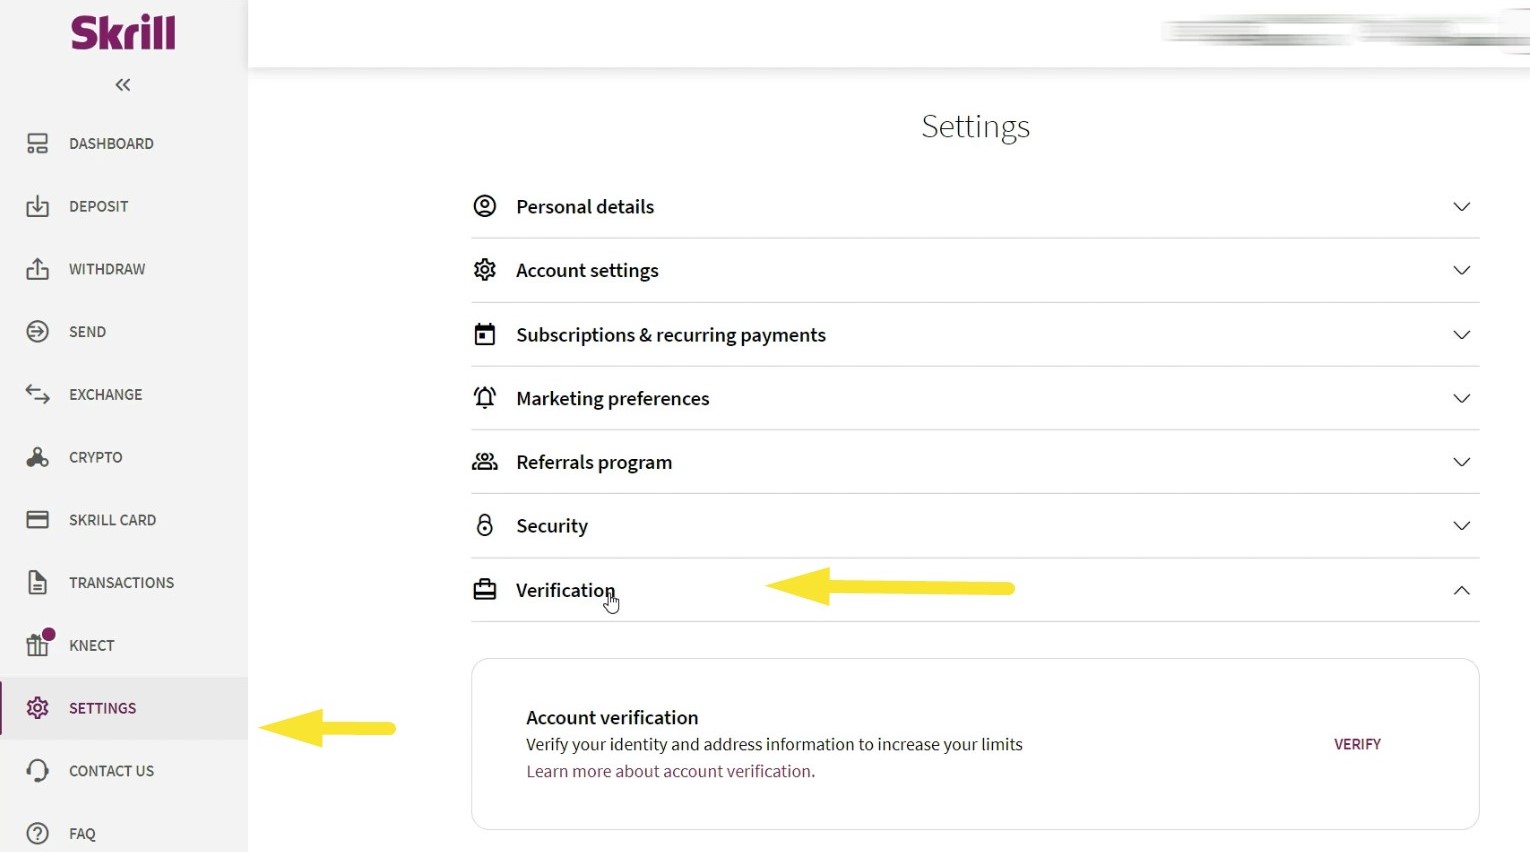
From there, you need to follow the steps below:
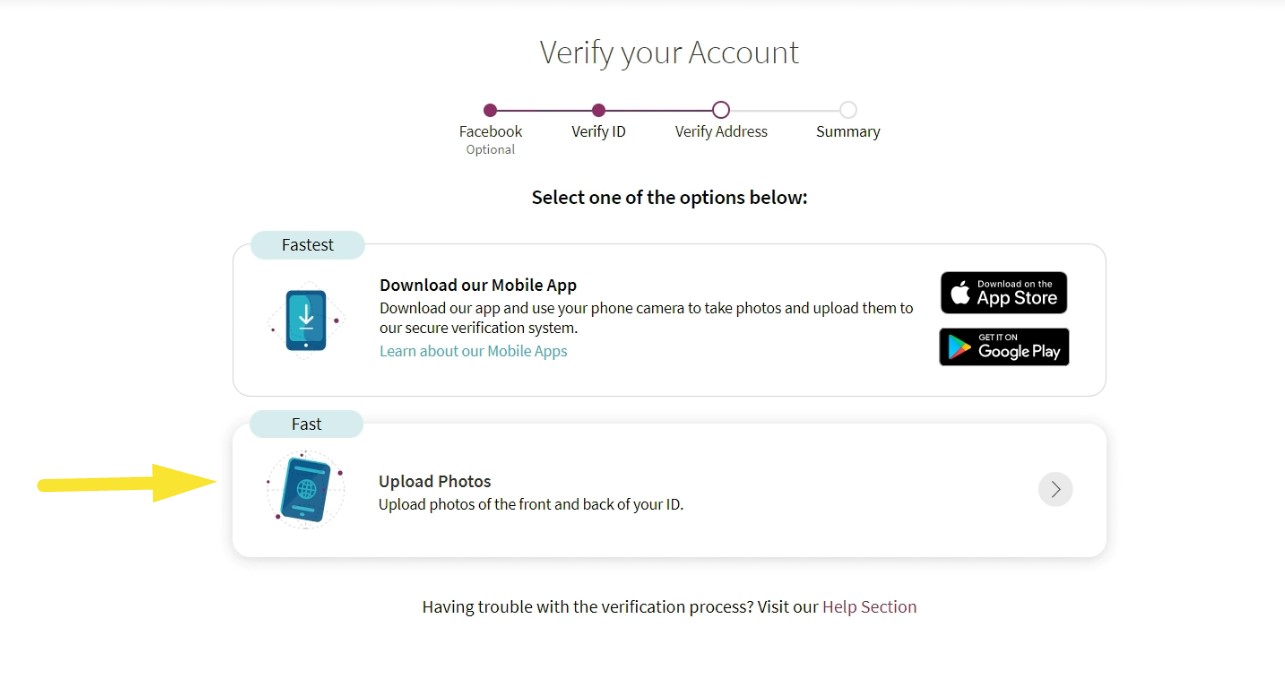
5. Confirm Your ID
Take two photos of your ID document, back and front. Transfer them to your computer.
Make sure they are high quality!
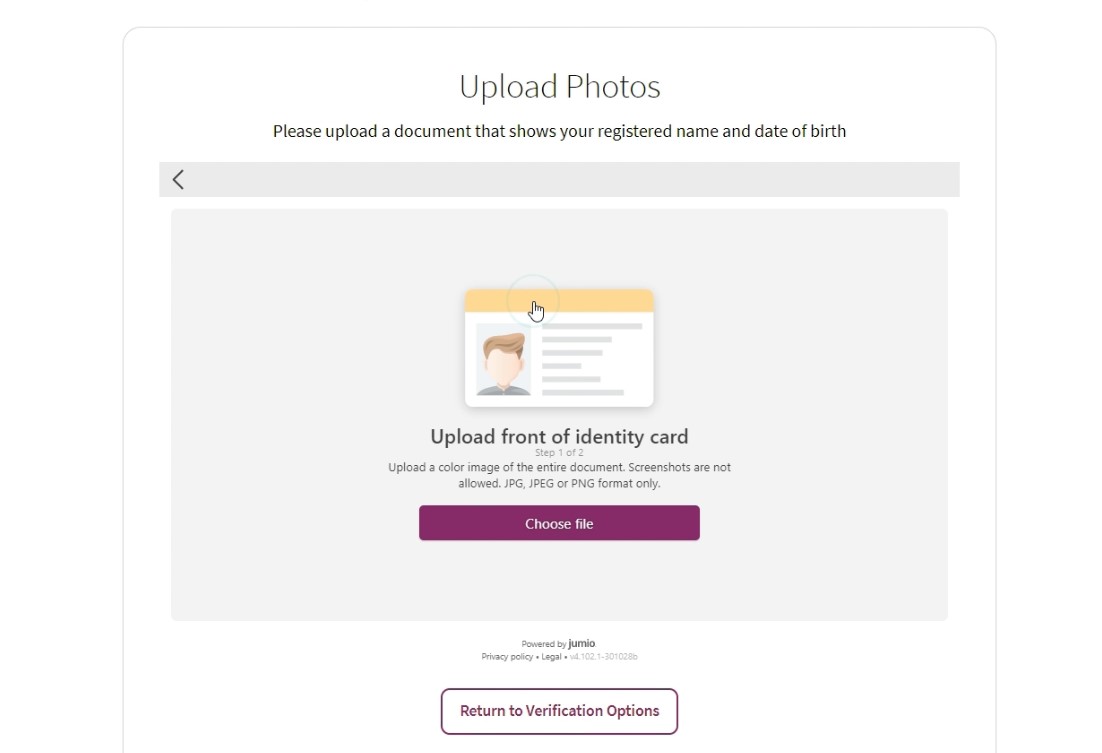
6. Upload the front of your ID card
Transfer the photo of the front of your ID card and upload it.
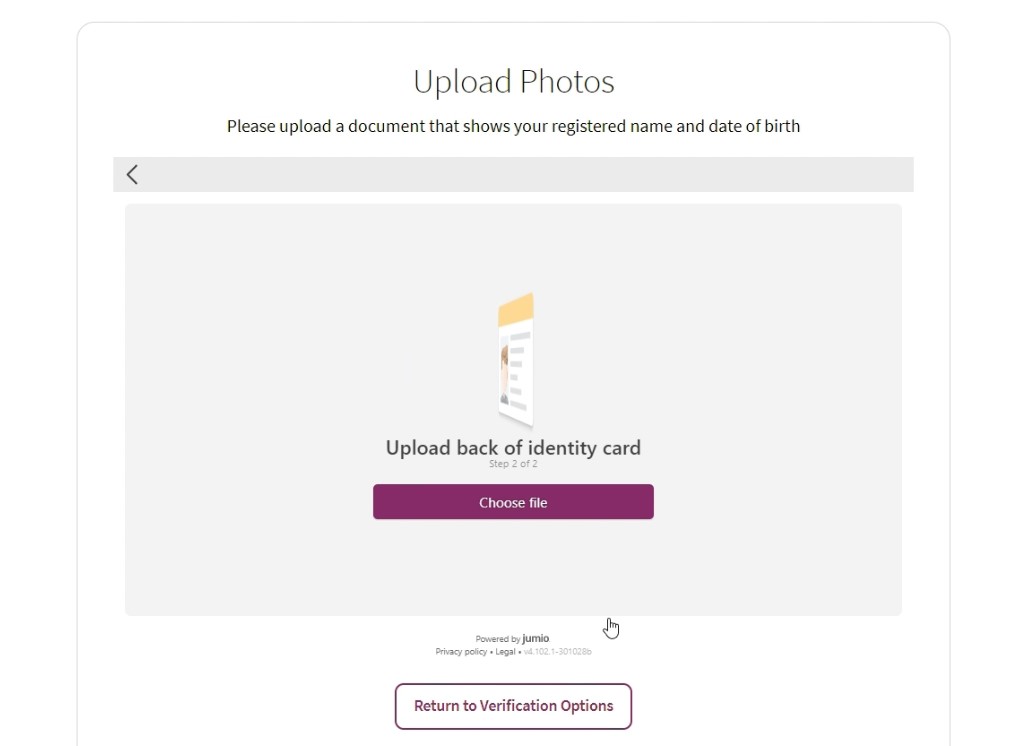
7. Upload the back of your ID card
Transfer the photo of the back of your ID card and upload it.
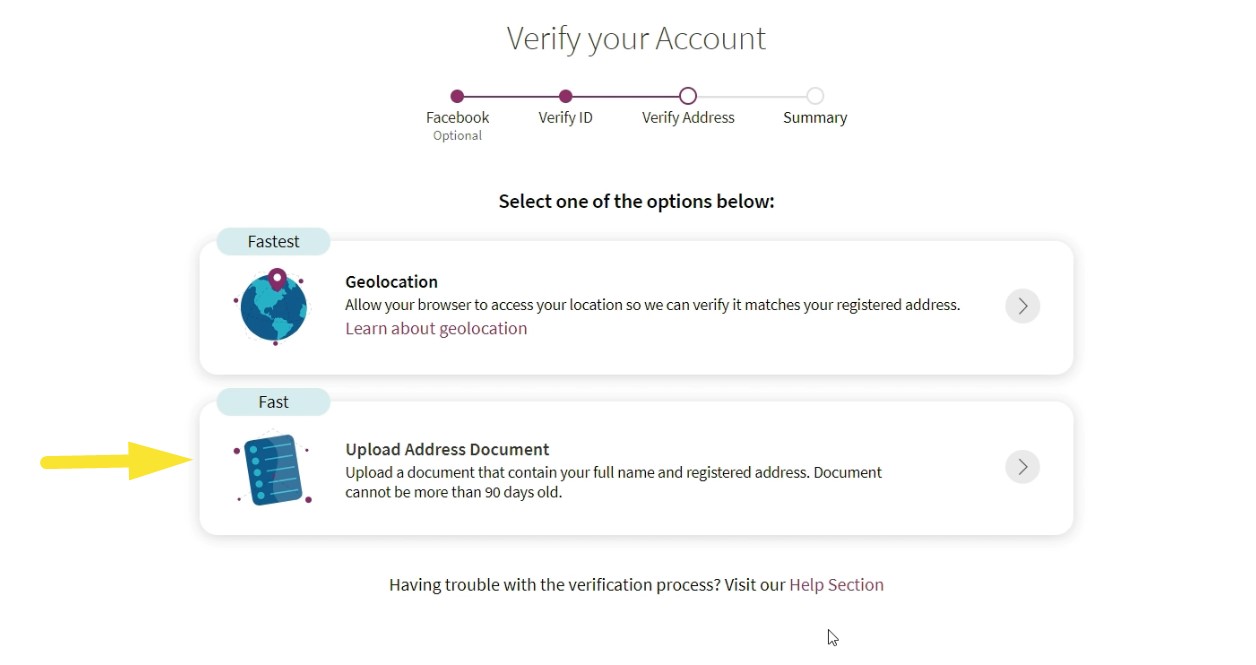
8. Verify Your Address
Choose a document that contains your full name and address, not older than 90 days.
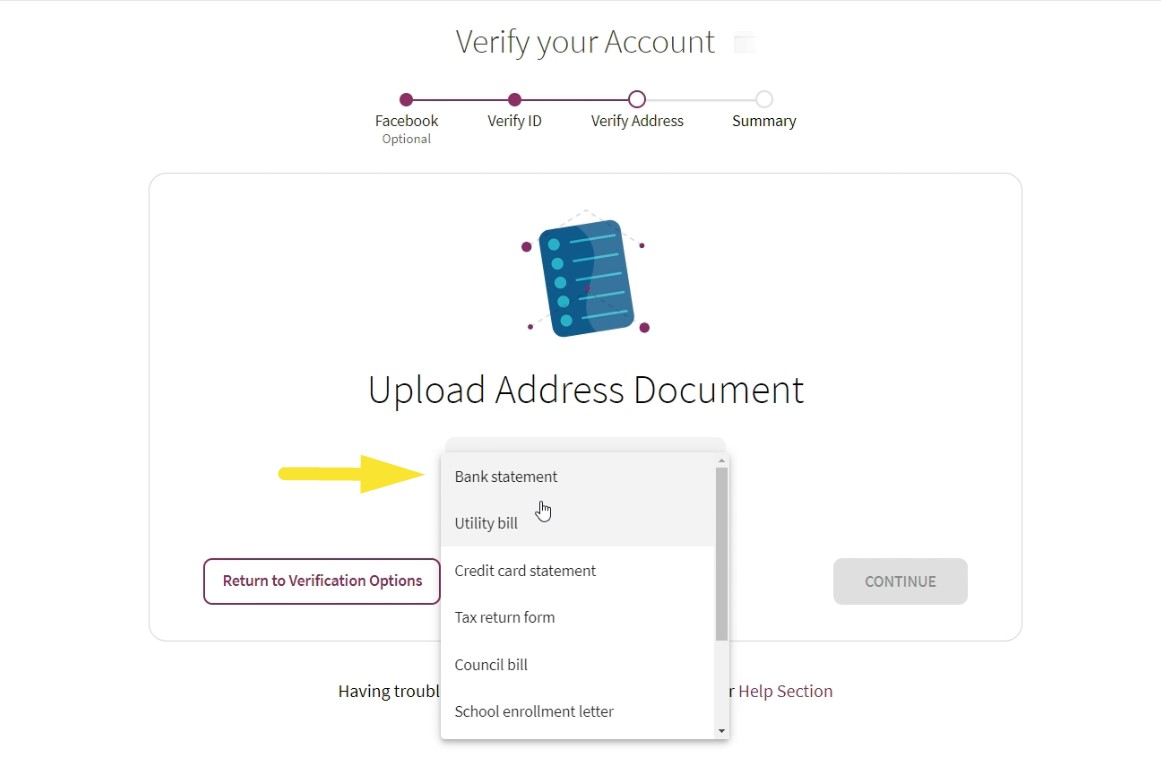
9. Upload the Address Document
We chose the receipt for the Youtube Premium membership.
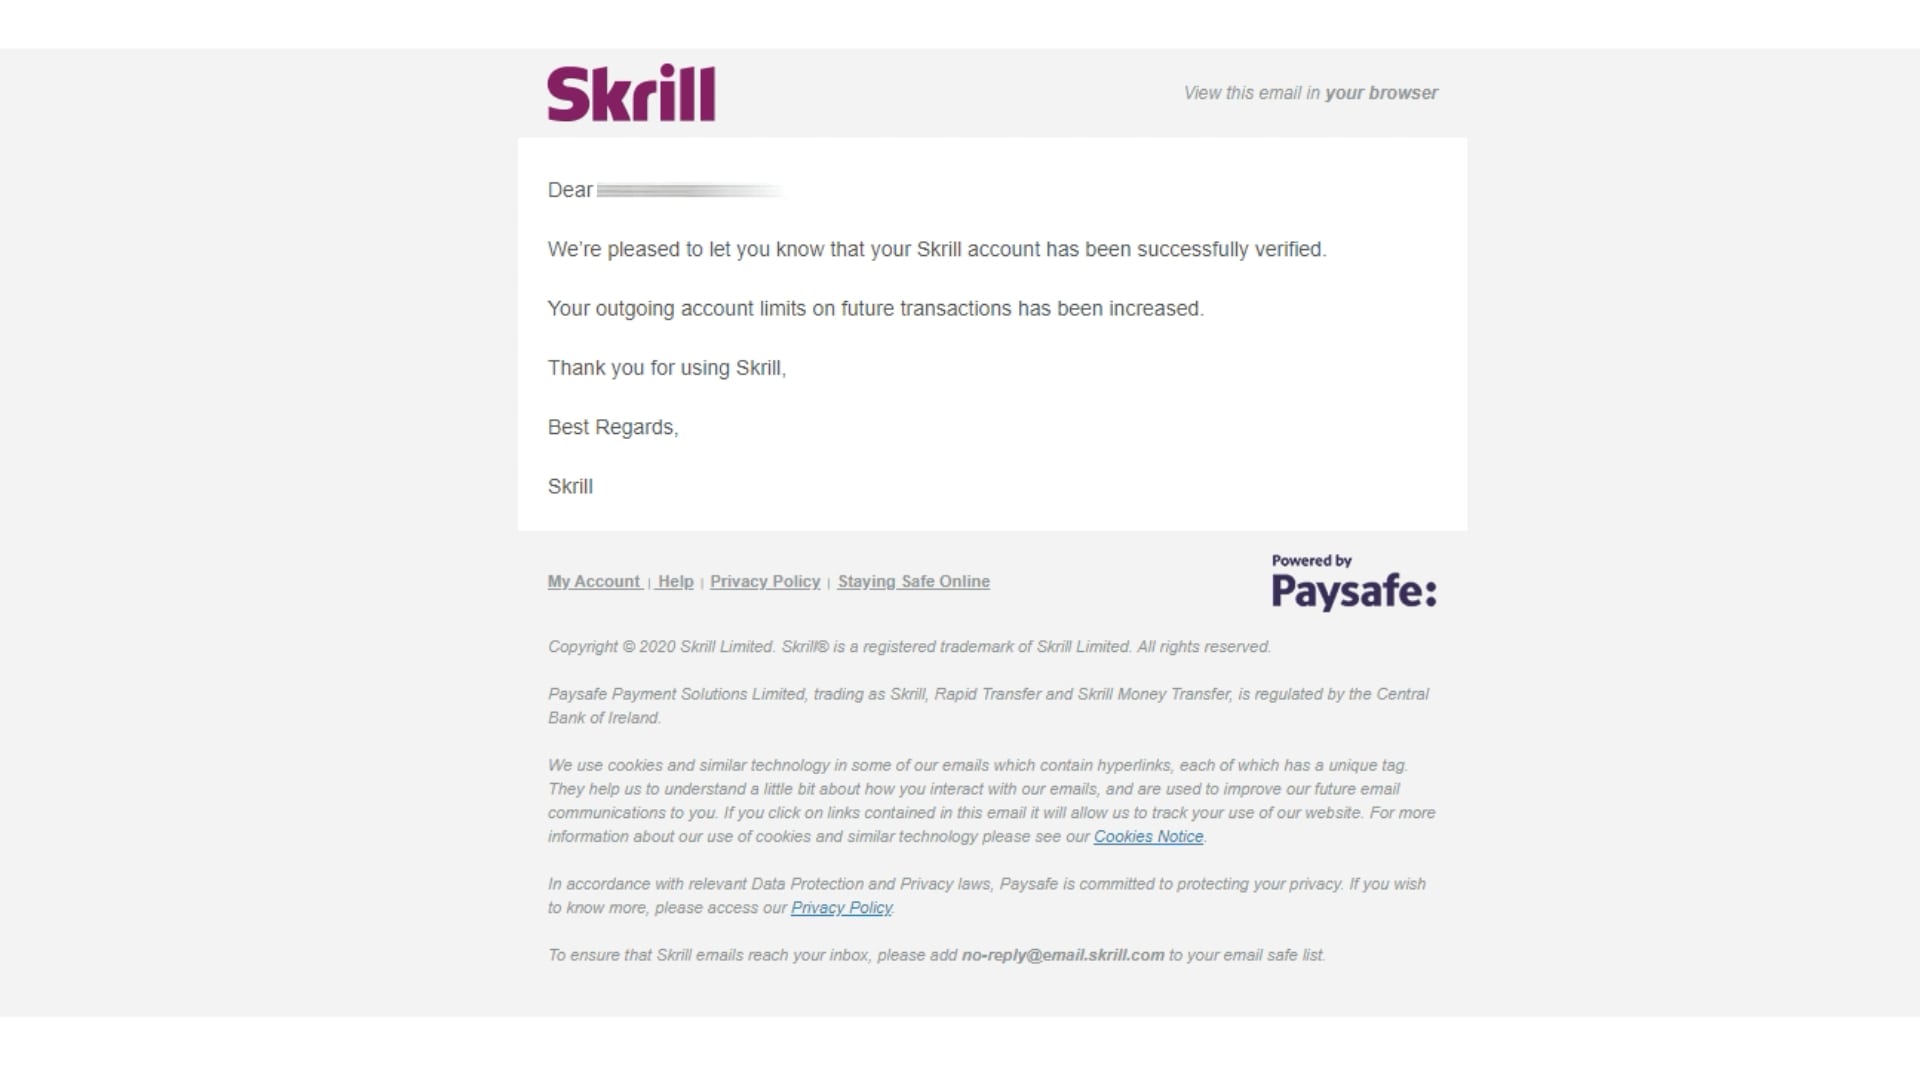
10. Email Verification
In 1-2 working days you will receive the confirmation email from the Skrill team.
 We hope these steps will help you in the process of verifying your Skrill account. Please give this article a like, and don’t forget to also check out Chipy’s Skrill tutorials playlist on Youtube. Good luck!


comments
Add comment